Tutorial · 3D & VR
Publish a 3D model on the web, with AR on phones
Compress a GLB, show it on a web page with the model-viewer component, add annotations and let visitors place it in their room.
Beginner11 min read

Key takeaways
- The model-viewer web component shows a GLB in a few lines of HTML, with no app and no build step.
- Compress the model first. A smaller file loads faster on every device.
- Hotspots add labels at points on the model, and the ar attribute offers placement in the real world on phones.
- Write alt text, show a poster image and test on real phones.
A 3D model is far more useful when people can open it with a click. This tutorial shows how to put one on a web page, so that anyone with a phone or laptop can turn it around, read labels on its parts and, on a phone, place it in their own room using augmented reality. There is nothing to install and no framework to learn.
You will use an open-source web component called model-viewer, which does the 3D drawing and the AR hand-off for you. It works with the glTF format in its single-file form, GLB.
What you need
- A model in GLB format. You can export one from Blender or other 3D software, convert a scan, or download a free sample model.
- A text editor and a browser.
- A way to serve files locally, for example by running python -m http.server 8000 in your project folder. Browsers block 3D files opened straight from disk.
- Node.js, only if you want to try the compression step.
Step 1: compress the model
A heavy model makes visitors wait, and many will leave. A command-line tool called glTF Transform can shrink a GLB a great deal by compressing its geometry and textures.
npx @gltf-transform/cli optimize museum.glb museum-small.glb --compress draco --texture-compress webpCheck the file sizes before and after. Open both to make sure that nothing important changed. For a visitor on a phone, a few megabytes is a good target.
Step 2: show the model on a page
Create an index.html file. The script line loads the component from a CDN. The model-viewer tag does the rest.
<!doctype html>
<html lang="en">
<head>
  <meta charset="utf-8" />
  <meta name="viewport" content="width=device-width, initial-scale=1" />
  <title>My first 3D model</title>
  <script type="module" src="https://unpkg.com/@google/model-viewer@3.5.0/dist/model-viewer.min.js"></script>
  <style>
    body { margin: 0; font-family: system-ui, sans-serif; }
    model-viewer { width: 100%; height: 80vh; background: #f2f2f2; }
  </style>
</head>
<body>
  <model-viewer
    src="museum-small.glb"
    alt="A 3D model of a small museum hall"
    camera-controls
    auto-rotate
    shadow-intensity="1"
    environment-image="neutral">
  </model-viewer>
</body>
</html>
Open http://localhost:8000 and try it. Drag to orbit, scroll or pinch to zoom. The alt text matters: it describes the model to people who use screen readers.
Step 3: add a poster so the page does not look empty
While the model downloads, the visitor sees a blank box. A poster, which is a still image, fills that gap. You can also delay loading until the visitor interacts, which saves data for people who never touch it.
<model-viewer
  src="museum-small.glb"
  poster="museum-poster.webp"
  reveal="interaction"
  loading="lazy"
  alt="A 3D model of a small museum hall"
  camera-controls>
</model-viewer>
Step 4: add annotations with hotspots
Hotspots attach a label to a point on the model, and the label follows the point as the model turns. You give each one a position in the model’s own coordinates, in metres, and an optional normal, which says which way the point faces.
<model-viewer src="museum-small.glb" alt="A 3D model of a small museum hall" camera-controls>

  <button slot="hotspot-door"
          data-position="1.2 0.9 2.4"
          data-normal="0 0 1"
          style="background:#fff;border:1px solid #111;padding:4px 8px">
    Main entrance
  </button>

  <button slot="hotspot-case"
          data-position="-0.8 1.1 0.5"
          data-normal="0 1 0"
          style="background:#fff;border:1px solid #111;padding:4px 8px">
    Display case
  </button>

</model-viewer>Step 5: let visitors place it in the room with AR
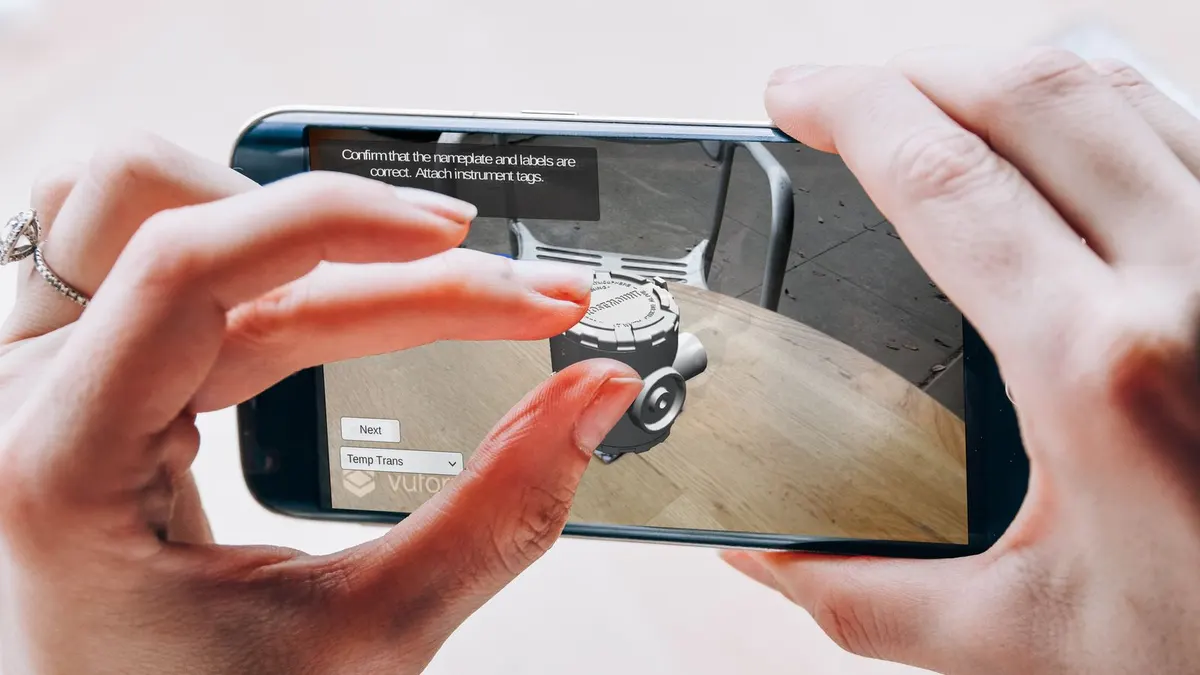
Adding the ar attribute makes a button appear on supported phones. Tapping it opens the phone’s own AR viewer, where the visitor can place the model on the floor or a table at its real size. For this to work, your page must be served over HTTPS, so test AR on a hosted copy, not on localhost.
<model-viewer
  src="museum-small.glb"
  alt="A 3D model of a small museum hall"
  ar
  ar-modes="webxr scene-viewer quick-look"
  ar-scale="fixed"
  camera-controls>
  <button slot="ar-button" style="position:absolute;bottom:16px;right:16px;padding:10px 14px">
    View in your space
  </button>
</model-viewer>- On Android, AR opens through Scene Viewer or WebXR.
- On iPhone and iPad, AR opens in Quick Look, which uses the USDZ format. The component can create it for you, or you can supply your own file with the ios-src attribute.
- Models must be at real-world scale for AR to feel right. Check that your model is built in metres.
Step 6: publish it
A model-viewer page is a set of static files: the HTML, the GLB and the poster. Any static host can serve them, including a content delivery network, a cloud storage bucket or your website’s own server. Make sure that the host sends the right file types, and allow the page to load files from the same address. To place the viewer on an existing page, copy the script line and the model-viewer tag.
Make it work for everyone
- Write meaningful alt text, and give the key information in plain text on the page too.
- Keep controls reachable by keyboard. The component supports keyboard navigation with camera-controls.
- Do not rely on motion. Offer a way to stop auto-rotate, or leave it off.
- Test on a slow connection and on an older phone.
- State clearly if the model is a reconstruction or an estimate.
Troubleshooting
- The box stays empty: open the browser console. A wrong file path or a missing server is the usual cause.
- The model is huge or tiny: it was exported in the wrong units. Re-export in metres.
- The model is dark or flat: try environment-image="neutral" and increase exposure slightly.
- AR button missing: your device may not support AR, or the page is not on HTTPS.
- Textures look wrong: re-export as GLB so that textures are packed inside the file.
Where to go next
- Switch between model variants, such as colours or states, with the variant features.
- Control the camera from your own buttons, for a guided tour that steps from point to point.
- Move to a fuller engine such as three.js or Babylon.js when you need complex interaction.
- Stream a very large scene as 3D Tiles instead of a single GLB.
Frequently asked questions
- Is model-viewer free?
- Yes. It is open source. Check its licence and the terms of any model you display, because the models you use have their own licences.
- Can I use it with React or another framework?
- Yes. It is a standard web component, so it works in any framework, with wrapper libraries available if you want them.
- How large can the model be?
- Keep to a few megabytes for a good experience on phones. Larger scenes should load progressively or in tiles.
- Do visitors need an app for AR?
- Not on most modern phones, which have AR built in. The experience opens in the phone’s own viewer.
In a few lines of HTML, you have turned a 3D file into something anyone can explore, inspect and place in their own space. That low barrier is what makes web-based 3D so powerful for tours, products, heritage and training.
Join the conversation
Reactions & comments
Comments are opening soon.
In the meantime, tell us what you think by email at info.istem.lab@gmail.com.